Saturday, June 23, 2012

Sump Pump - 2nd attempt

So the Woodridge city came to our house and said we needed to fix our sump pump so that it doesn't spit out water into the street anymore...stupid I know. So we had to adjust it so that it dissipated into the ground instead of shooting out on the street. We just have so much water, because we are on the bottom part of our neighbors houses and all their water falls into our property and thus through the sump pump. We had a huge dry spell with no rain and our pump was a still pumping...need we say more!

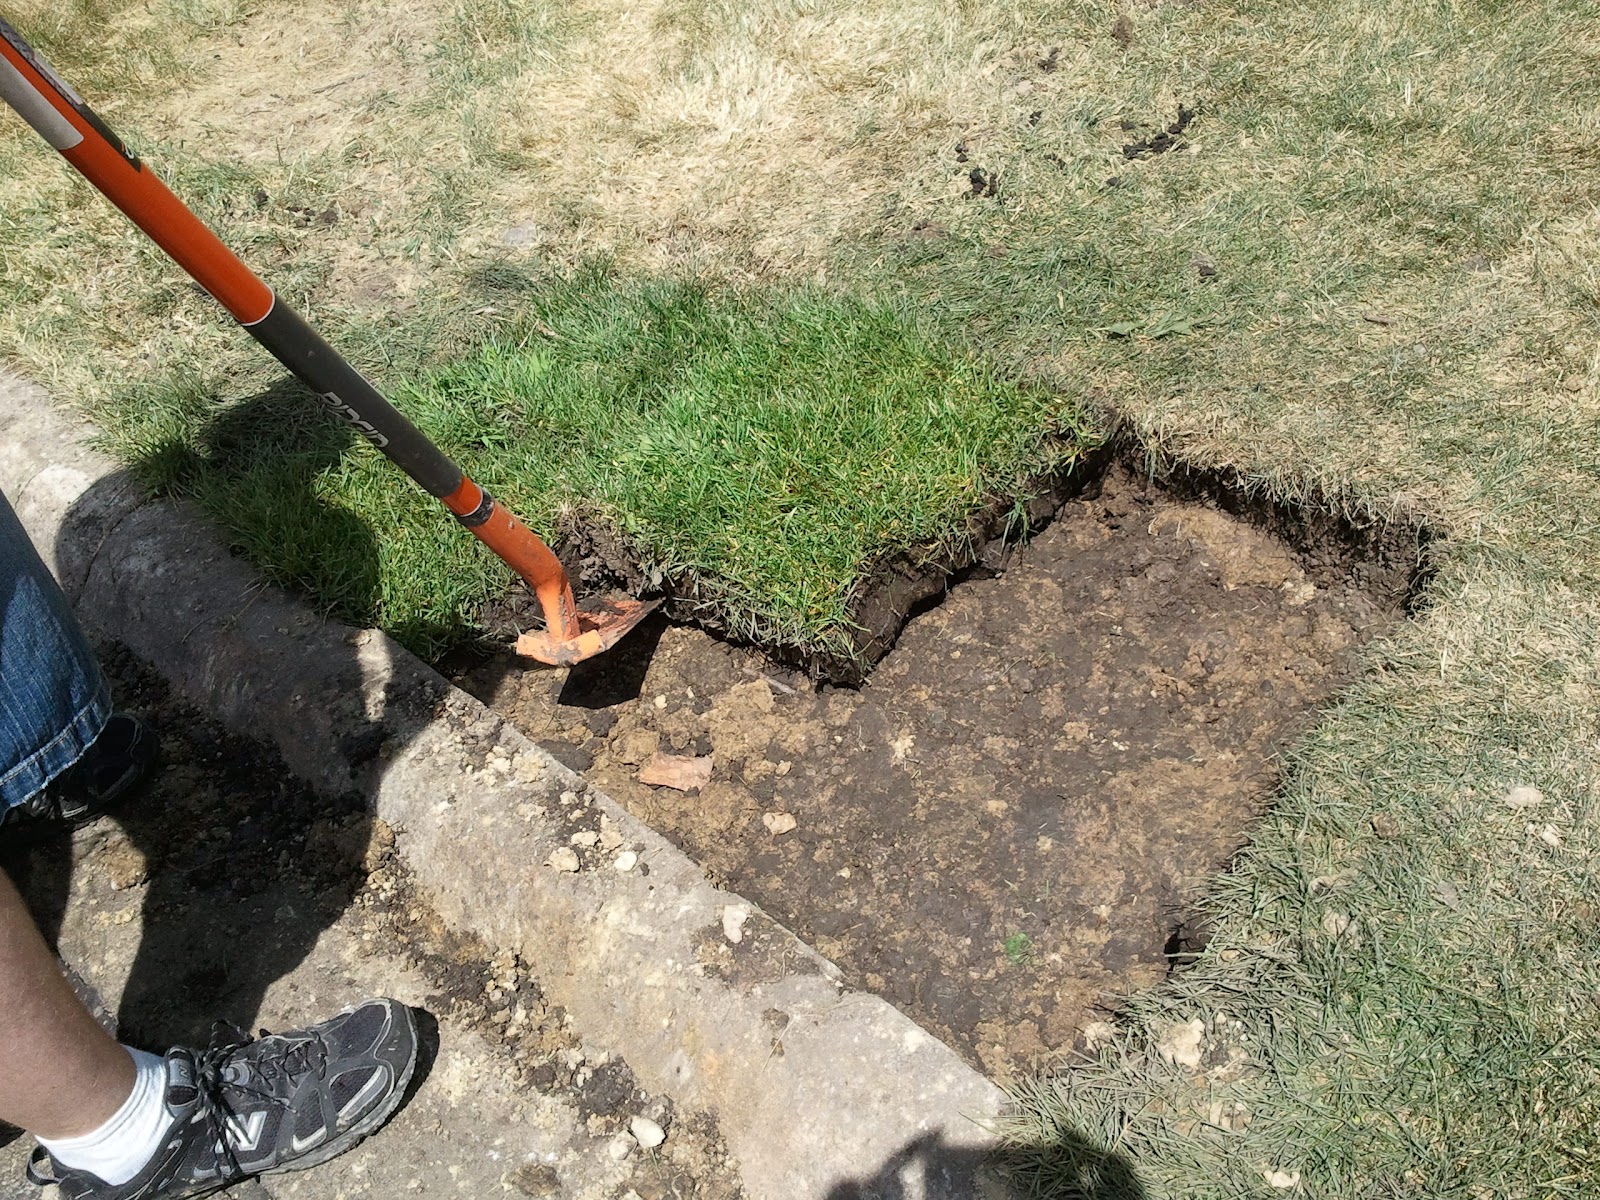
We wanted to be able to reuse the wonderful green grass that was currently there. So Dan had to carefully cut the ground and remove the grass so we could put it right back when done.


Now that all the grass is removed...we dig and dig and dig...thanks Kent and Alan for helping with the digging...ugh...that's hard work!!


We needed it to be pretty deep to handle the large amounts of water we pump out. Then we had to place a fabric like strainer for the water to seep out, but without dirt getting in.


Then we had to add a layer of rocks to keep the fabric in place and get it high enough that the pipes we put in would be supported by the rock.


Then Dan worked his magic on making the pipe mechanism and drilling holes for the water to seep out of the pipes and into the rock membrane.


Then we added the rest of the rock...16 bags total! Wrapped up the fabric like a present and covered it with dirt and packed it down. We then carefully placed the grass back on and ALL DONE! Took about 6 hours...now it's time to jump in the pool and cool off and relax!!!


Sunday, June 19, 2011

Sump Pump redone (outside edition)

The first video is of me and our home inspector checking out our possible new house.

Here you can see our that we get our own mini grand canyon. I'm guessing if we left it for a few hundred thousand years, it might turn into a cool canyon of our own (we could call it the BBC Big Browns Canyon)


I used Kates Video Converter (favorite free editor, check it out) to cut the front and back part out, so that you don't get bored.

Here is some more clear pictures of our Canyon


So because we don't want a small Ice Rink on our sidewalk and Canyons in our neighbors yard from OUR water. We planned on running PVC all the way to the street.

And after 1 month of owning our home, our neighbors dad accidentally used too much fertilizer and killed ALL of their grass, so while they had all the grass up, now was my chance to put in the underground PVC (PERFECT TIMING).


Thanks to Nancy Chiostri's Son David helped me dig this trench. I could NOT do it without him.


We had to use a hammer and a pipe to get through underneath the sidewalk (shhhhh, I don't know if that's legal, but im sure its better then an ice rink).


Now lets see the final product and IF it works?


Yay it works, here is the added extender piece


Note: Over the winter, a plow (or something) snapped it off. 


It is also VERY green around the exhaust hole.

So that got us thinking of installing a a pop-up sprinkler head and use it to water our yard, who doesn't like free water.

I would have to install a threaded section, so I can replace it back to a pipe when winter comes again. Because this location is buried under a few feed of road slush.

Sunday, June 12, 2011

2 new Garage door lights

This is how our house originally looked without front garage lights. Notice, if you look closely, the house numbers are slightly twinged...that's been bugging Bonnie since we move in, Dan didn't even notice until we moved them.


We knew we wanted new lights in front because it was so dark with just the one front door light. You couldn't even see our house numbers at night. (note: we changed out the original light by the front door already)

Here is Dan drilling and getting ready for the new spot to place the light, which required moving the house numbers. This made Bonnie so happy because we could not fix the numbers.


If you thought that drill bit was big...
Dan had to whip out the even bigger guns!


Here is what the back of the electrical box of the front right light looks like.


Here is the right front light after instillation.


The instillation of the lights was all done last summer...and we just finished running the conduit and wiring a few weeks ago, YEAH!!

This is above our entryway, Dan had to reroute the conduit to suite his needs.


Here is the back of our right light again, just this time it has conduit attached.

 
Here is the box for our center motion/night sensor.


And here is our left front light.


Here is what the front of the sensor looks like.


Here are the working lights!! Please notice, for Bonnie's sake, the correctly placed address numbers. LOL.


P.S. Since we have talked about it so much here is a comparison of the numbers. As you can see we both have anal tendencies.
 
      Normal placement :)                            Handicapped "5" and "0"
   

Sunday, June 5, 2011

No more Tableage

Our house came with a wonderful (replace wonderful with nasty) table in the back yard. it came with termites, wood rot, oh and some lovely spore colonies. It would have been cute if it was new and not warped. We couldn't even find a good spot to put a cup without it spilling the contents.

So we decided on Memorial day before our pool party with our Family to tear it down.

Here is what it looked like in all its glory (I took these pictures with my phone, so they might not look as good, i also made this first picture larger (or click on it) so you can see its waviness)

Here it is after i took it all apart.


And here it is after I cut it up for use in our fire pit.

Sunday, May 29, 2011

New Floors, WOOHOO!!!

We (basically) finished our floors upstairs.

We used to have Painted Parquet (See Enclosed Pictures).


We loved them soo much that we tore them up and threw them away for others to enjoy.


Here Kent Salmond (Bonnies Brother) Shows how to remove ugly flooring. For those of you thinking of doing the same here is a Video Demonstration.


 note: when using a pry-bar to remove said nasty flooring, attack the floor at a 45 degree angle to the loose painted parquet all while prying up and down to loosen stubborn tiles. Also it is very useful to get some assistance to lesson the amount of pain inflicted on the pry-bar user.

Now for the cleanup of the loose tiles.


Now that they are removed, we can screw down the entire floor (we dont want to worry about squeeks after the floor is down). Thank you Dad, Alan and Matt Byrne.
We went through 15lbs of 3" Screws.

After the screws and a new back brace.We could start laying down the floors.
1. Lay down "Quiet Walk" underlay, while making sure to tape the seams (great vapor, insulation, and noise barrier)

2. Figure out a pattern for the floors. Here is our pattern 9" right, 18" left, 9" left, 18" right and repeat.

3. Start with groove towards the wall (tongue away from the wall) and drill small holes for finishing nails in the upper groove of the tongue on a 45 degree angle, and hand nail each 3' board at least 4-5 times. (thanks to the Diestlers for helping multiple times, Alex drilled and I nailed).


4. Once far enough away from the wall, you can whip out the floor stapler, it goes much quicker with that bad boy (thanks to Jason Wilde for letting us borrow his stapler).


5. when you get close to the wall, again the stapler doesn't fit, you need to screw holes (because the bamboo is harder than oak and will bend the nail if no whole is drilled) and hand nail again.


After 3 bedrooms, a hallway, 4 closets, a living room and a dining room (1,100sq ft) later we have finally finished, woohoo.

Here are some before and afters.

Upper Hallway

Upper Stairs into Living Room

Dining Room


Master Bedroom

Bedroom #2

Thanks for joining us on our Journey. This one took us the longest at about 15 months. We know we love it, now you can too, haha.